.png)
Working with Images
Images with embedded profiles are one of the keys to communicating color within an ICC workflow. An image with an embedded profile is changed from raw device data (RGB, CMYK, and so forth) to color. More precisely the image can be converted, using the embedded profile, to Lab. Lab is a numeric representation of color stimulation and with the use of additional profiles – for the monitor or printer – the colors can be converted to the device settings that will reproduce, as closely as possible, the colors originally viewed by the original image’s creator.
ColorThink will accept 8-bit or 16-bit images, and file types can include .tif, .jpg, .png and images encoded in Lab.
Caution about image sizes
Ideally, we recommending using uncompressed .tif images which are relatively small in size (scaled down if necessary) so that pixel calculations will not take too long. Also performance is improved when using minimum image compression and interleaved pixel order when saving .tif images for use in ColorThink. See Accepted File Types below for more details. Please note that for diagnostic purposes, ColorThink does not need to see a full-sized image in order to view what colors are involved. In the vast majority of cases, a scaled-down version (ie: less than 1 megapixel in size) will adequately represent the colors using ColorThink tools.
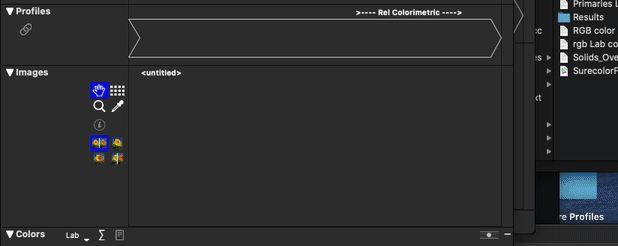
Image Coordinate Display
When the dropper tool is active and the pointer is over the active image area, the x,y coordinates of the sampled pixel information are displayed here.
Dropper Value Display
When the dropper tool is active and the pointer is over the active image area, the source and destination color information for the sampled pixel is displayed beneath each image. If the image represents color-list information (it is a target) the patch’s name is also shown.
Image Selection Points
When selection points have been added to an image, they are shown as small black/white crosses.
Opening Images
Select File > Open and select an image file. (See Accepted File Types for a description of the image types ColorThink will open.)
Drag an image file onto the ColorThink application icon or the Menu Bar.
ColorThink will open the image into a new worksheet and display its embedded profile in the Profile region. Images shown on screen are color accurate. That is, the image shown has had its embedded profile and the monitor profile applied.
Automatic down-sampling
For the purposes of speed and memory use, large RGB images are down-sampled as they are opened into the Worksheet. The image size of this thumbnail image will have an upward limit of 1000 pixels on any side.
Exceptions:
Images that are in CMYK or Lab color space (for example: converted to Lab in Photoshop, and then brought into the Worksheet) will not be downsampled but will be available in the worksheet at their full resolution. (See caution about image sizes above.)
Many of the recommendations for image size in the Grapher are applicable in this case as well.
Accepted file types
As ColorThink 4 is not intended as a production tool, a limited number of image file formats are supported. If you do not find that ColorThink directly supports your image format we recommend opening the image into Photoshop and saving as TIFF for use within ColorThink. Overall we recommend TIFF images as they don’t suffer from lossy compression issues, can contain embedded profiles and support the widest range of color spaces. (RGB, CMYK and Lab)
Image file formats opened by ColorThink are:
TIFF - RGB, CMYK and Lab (ICCLab and CIELab)
JPEG - RGB
GIF - RGB
PNG - RGB
WebP - RGB
HEIC - RGB, Mac only
Both 8-bit and 16-bit images are supported in ColorThink.
Image Information 
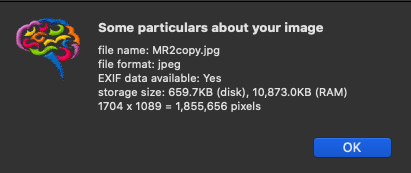
Clicking on the Information icon will bring up information on the image including:
Image name and format
Storage size
The thumbnail size (in pixels) of the downsampled image.
Saving Images
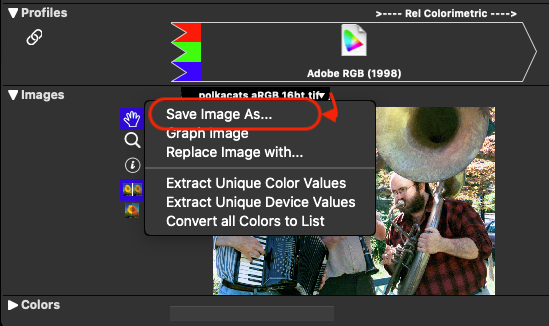
To save an image to disk, click on the image popup menu for the desired image and select:
Save Image As...
You will be presented with a dialog requiring you to select which of the transform’s data sets you wish to be saved as an image file. Once selected, ColorThink will save the image to disk as a TIFF file.
Note: Due to automatic down sampling the saved image may not be the same resolution as the original source image.
Replacing the Image
A workflow’s source data – image or color list - can be replaced by an image or color list. In this way a workflow can be tested using multiple images and color lists. To replace the image:
Option/alt-drag the replacement image or color list file onto the source image, or
Choose Replace Image... from the image popup menu and select the image or list to open.
'Assigning' a profile to an image
To assign a profile to an open image either drop the profile onto the Profile Region above the image/list OR open the profile by choosing Replace Profile... from the profile popup menu.
Note:
Only a profile matching the source color space of the image can be assigned to it. For instance, assigning an RGB device profile to an RGB image will work. Assigning a CMYK profile to these will not.
If an image contains Lab data then assigning will not work. Lab data is considered the “destination” of a transform so profiles will be applied to this transform creating a new transform.
Transforming images using profiles
To transform an image with a profile add the profile to the workflow by dragging it into the image region of the workflow OR choose it from the Add menu located at the upper right edge of the workflow. If the profile can be logically applied to the end of the workflow, ColorThink will create a new transform and assign the profile to it.
ColorThink will accept device, abstract and device link profiles into the worksheet wherever they can logically be applied.
To clarify, if the last transformation in the workflow contains:
Lab data: device and abstract profiles may be applied
Device data: device and link profiles that match the device space may be applied
For more information about profile types, please see ColorNews #27: The 7 Profile Types.
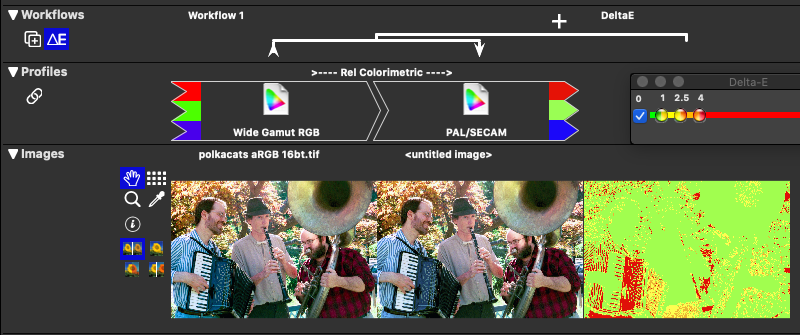
Comparing Images using delta-E
To compare images using delta-E, click the ∆E button in the Workflow region and ColorThink will display the delta-E column.
If the ‘begin’ and ‘end’ points of the delta-E comparison are images of the same dimensions (width & height) then ColorThink will calculate the difference between the images on a pixel-by-pixel basis. Otherwise, the difference will be calculated using color lists. Points will need to be selected from the images in order for these calculations to occur. See ‘Getting Pixel Color Information’ below to see how to select color points from an image.
See differences between images in Grapher
Use this procedure to view the differences between two images using vectors in the Grapher:
Open an image into the Worksheet
Select "Extract unique color values" from the image's popup menu
Select "Use as Primary Data Source" from the list's popup menu
Drop the second image onto the worksheet (it will open into a 2nd workflow on the same sheet)
Repeat the two steps you did for the 1st image:
- Select "Convert All Colors To List" from the image's popup menu
- Select "Use as Primary Data Source" from the list's popup menuClick the delta-E button in the upper left corner of the window
Select "Graph List" from the delta-E list's popup
Vectors displayed in the Grapher (Click to enlarge.)
The Grapher will show vector lines moving from one image to the other according to the delta E differences between images.
Note: Because of the number of color calculations involved, it is highly recommended that only small images be used for this procedure (scaled down if necessary.)
For more information regarding delta-E calculations and controls see ‘Using delta-E below’.